
DIY Light Table
DIY Light Table!
After working in the childcare industry for years, I have so many ideas to implement with our kids at home. The only thing I have to get my head around is that I don’t have the same ‘unlimited’ resources that I had when working. I can’t just open a storage cupboard and pull out something exciting to do with the kids in an afternoon. It needs a bit more planning, I don’t have the same sort of spending budget and I definitely don’t have the storage. The light table in my babies room at work, was always a hit and I could always find many different ways of using it. I don’t have the money to buy a light table, so here is my version of a DIY Light Table!
Materials needed.
This DIY Light Table is super easy to make and the materials are easily accessible. My sister and I took the twins to the local hardware store to find a plastic storage container and some battery operated fairy lights. They enjoyed shopping for the bits and pieces just as much as playing with the finished product.
To make the DIY Light Table you will need:
- A clear plastic storage container
- Tin foil
- White tissue paper
- Sticky tape
- Battery operated fairy lights
- Batteries (check the box the lights come in in case they’re not included)
- Scissors

Putting it together.
Luckily it didn’t take long to make the DIY Light Table. While the kids had their midday sleep, I smashed out the dishes. Because you know it takes sooo much longer to do them when the kids are awake (if you want a laugh about why it takes so long to do the dishes, check out my post in The everyday life of a twin/CF Mumma here.) . While I did my favourite job in the world (eye roll), my sister put the box together for me.
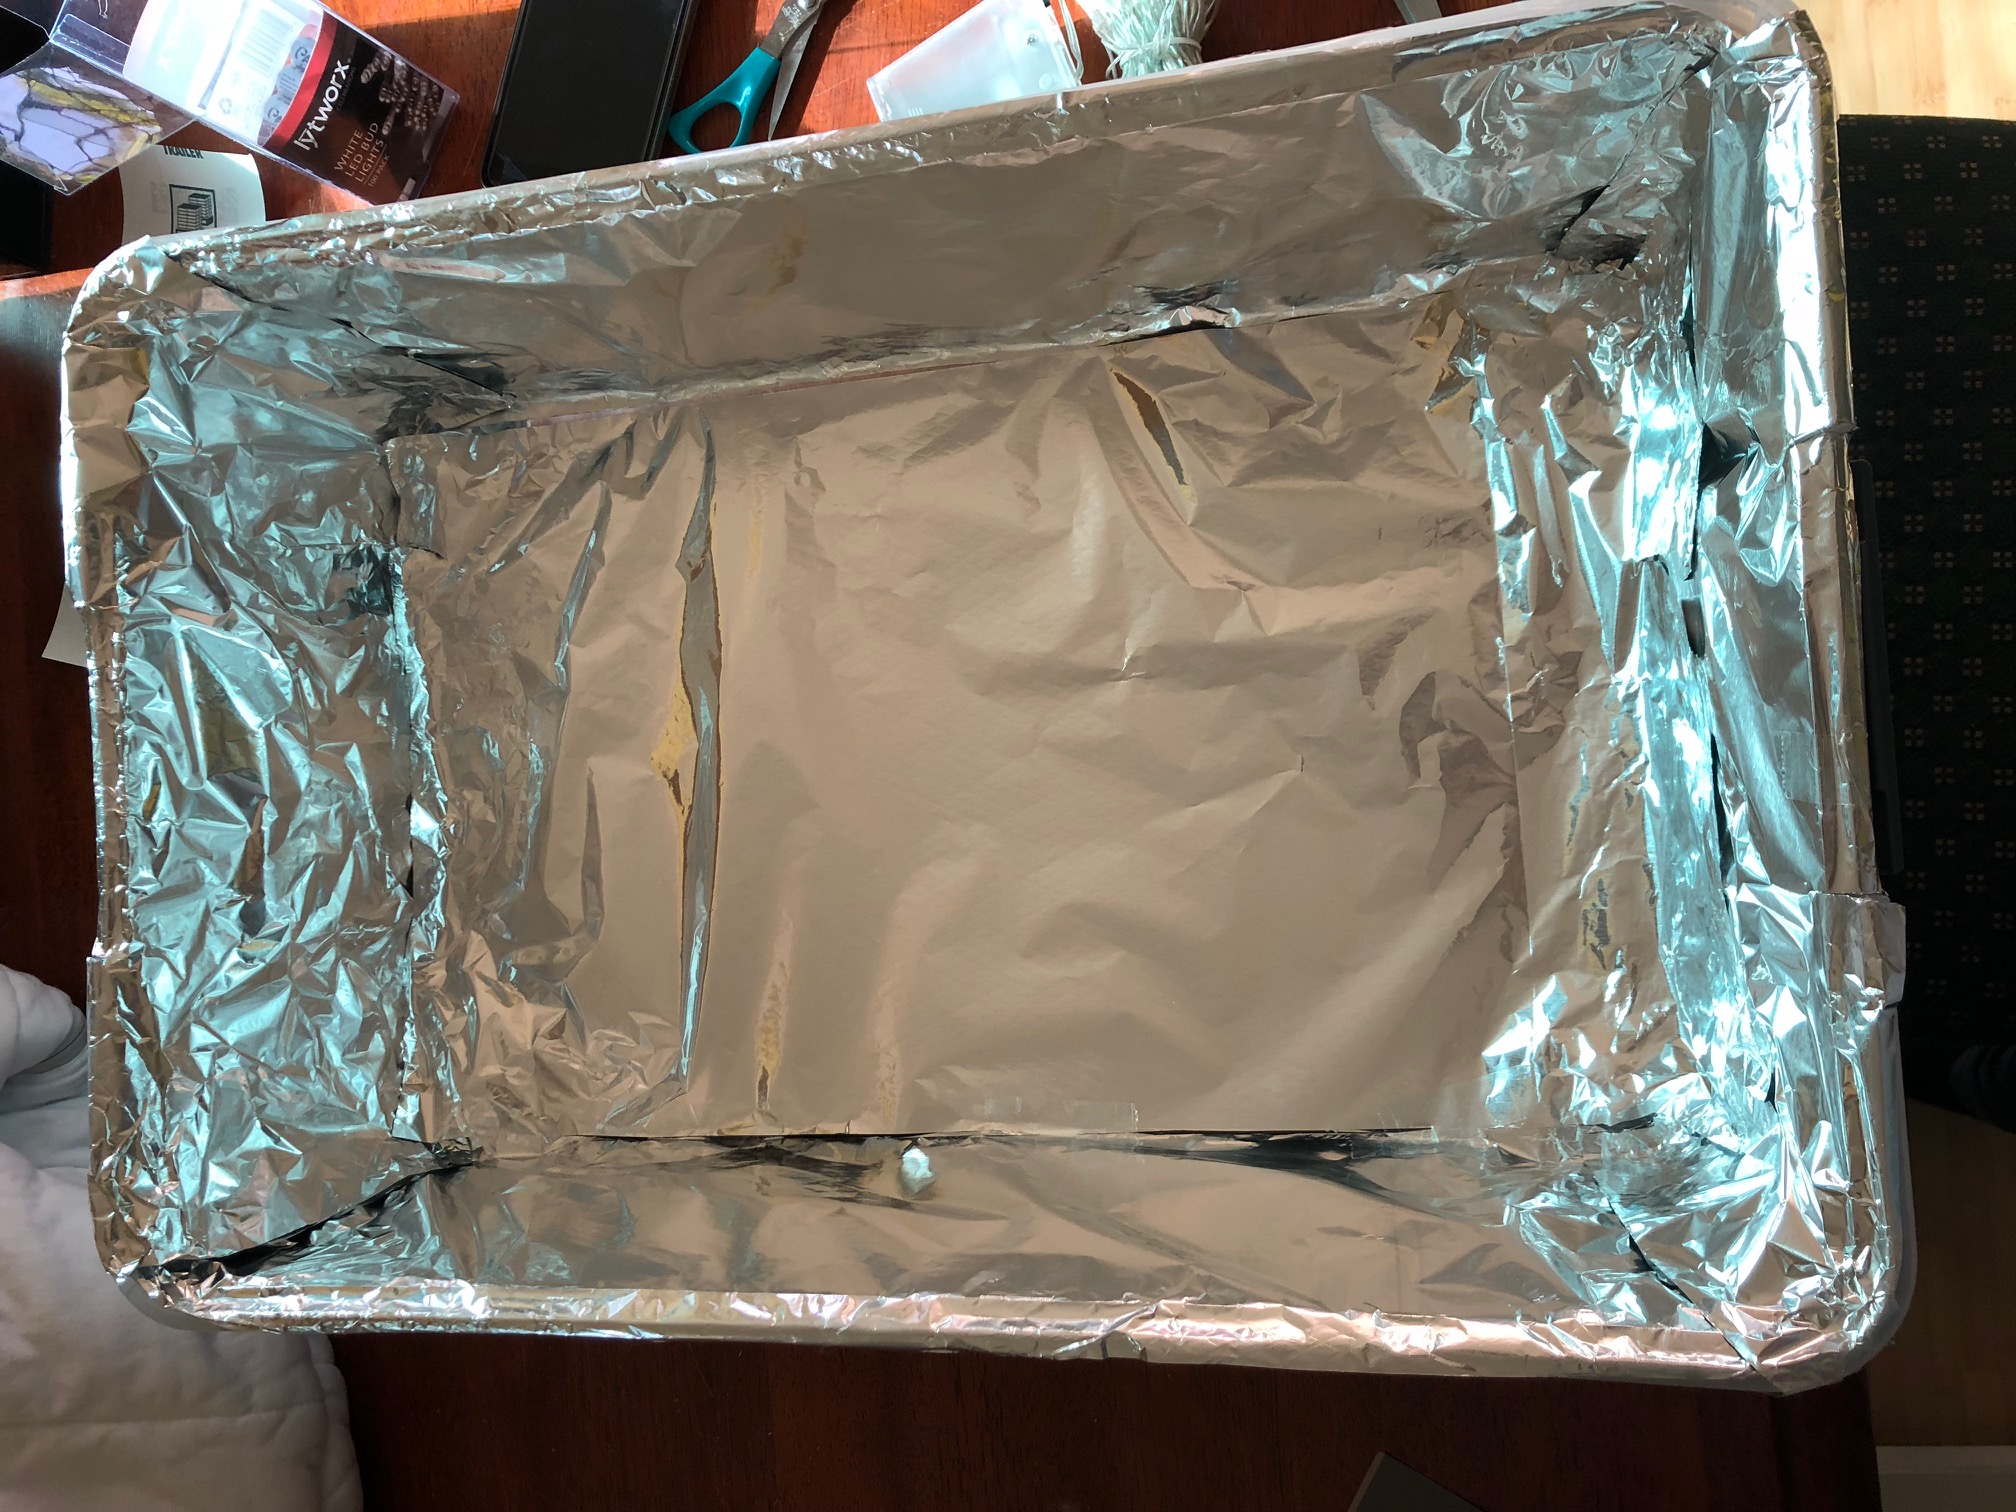
First step was to line the inside of the container with the tin foil. I truely don’t think it matters too much about how neatly you do this. As long as you have the shiny side of the foil facing up and you cover the entire container, you should be good to go. Just tape it into place along the edges of the box.
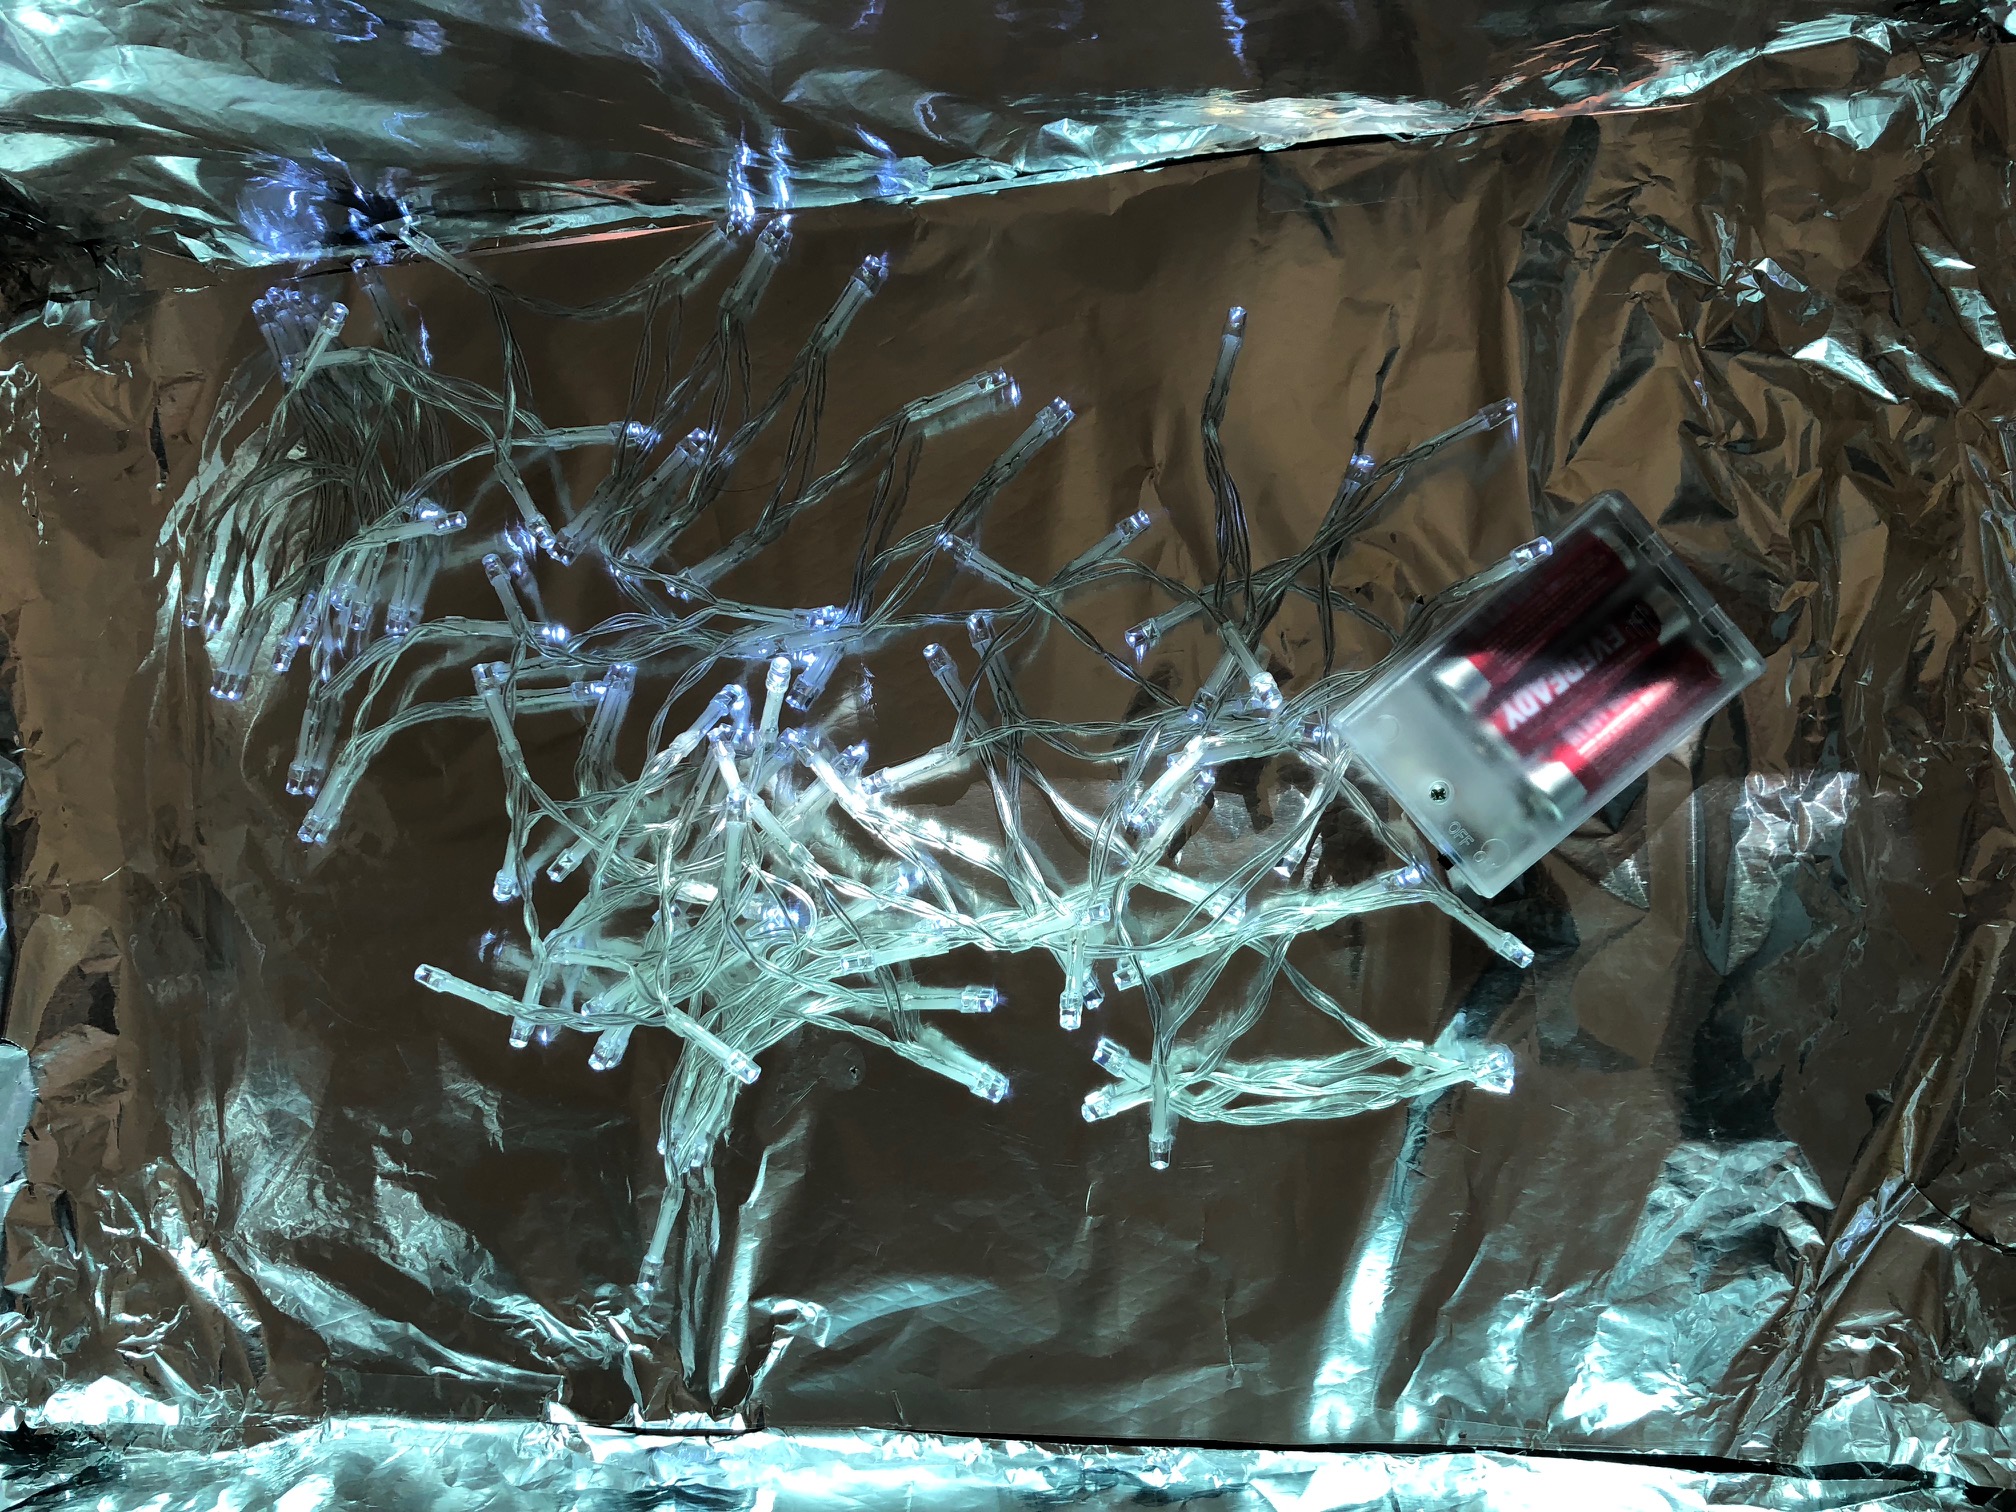
Next you need to cut out a piece of white tissue paper to fit on the inside of the lid. Tape this into place too. We weren’t able to find a clear container that had a smooth lid, so the bumps and indents did cause the tissue paper to tear slightly. This has no real affect on the end result though.

Next make sure the lights are working and then place them into the box (on) before closing up the lid.
Dark Room.
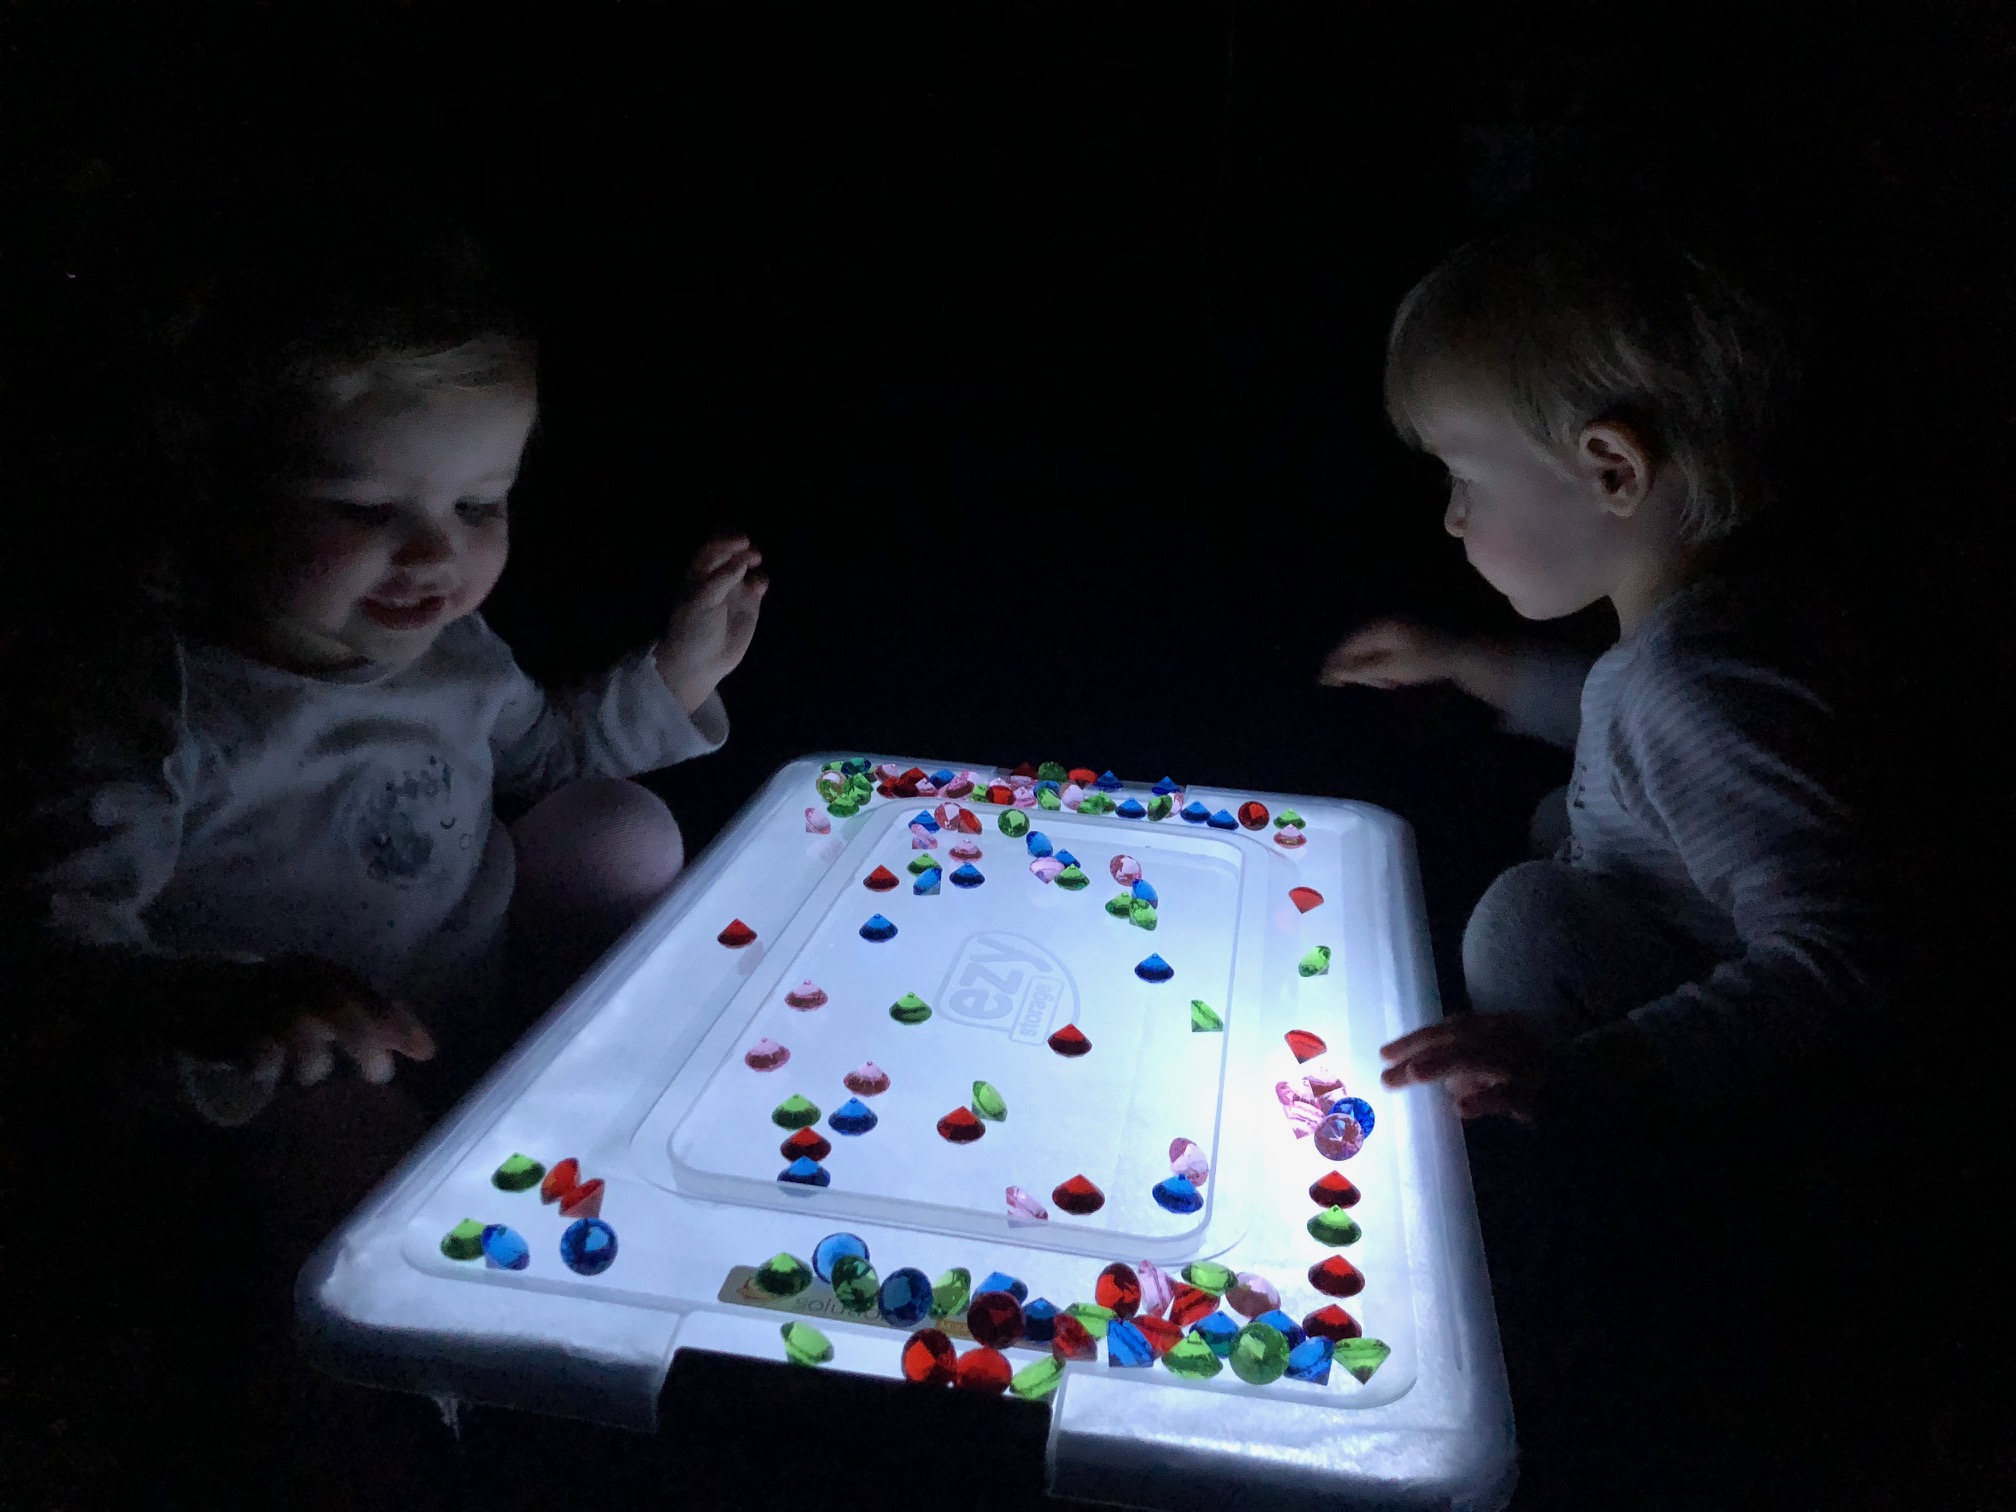
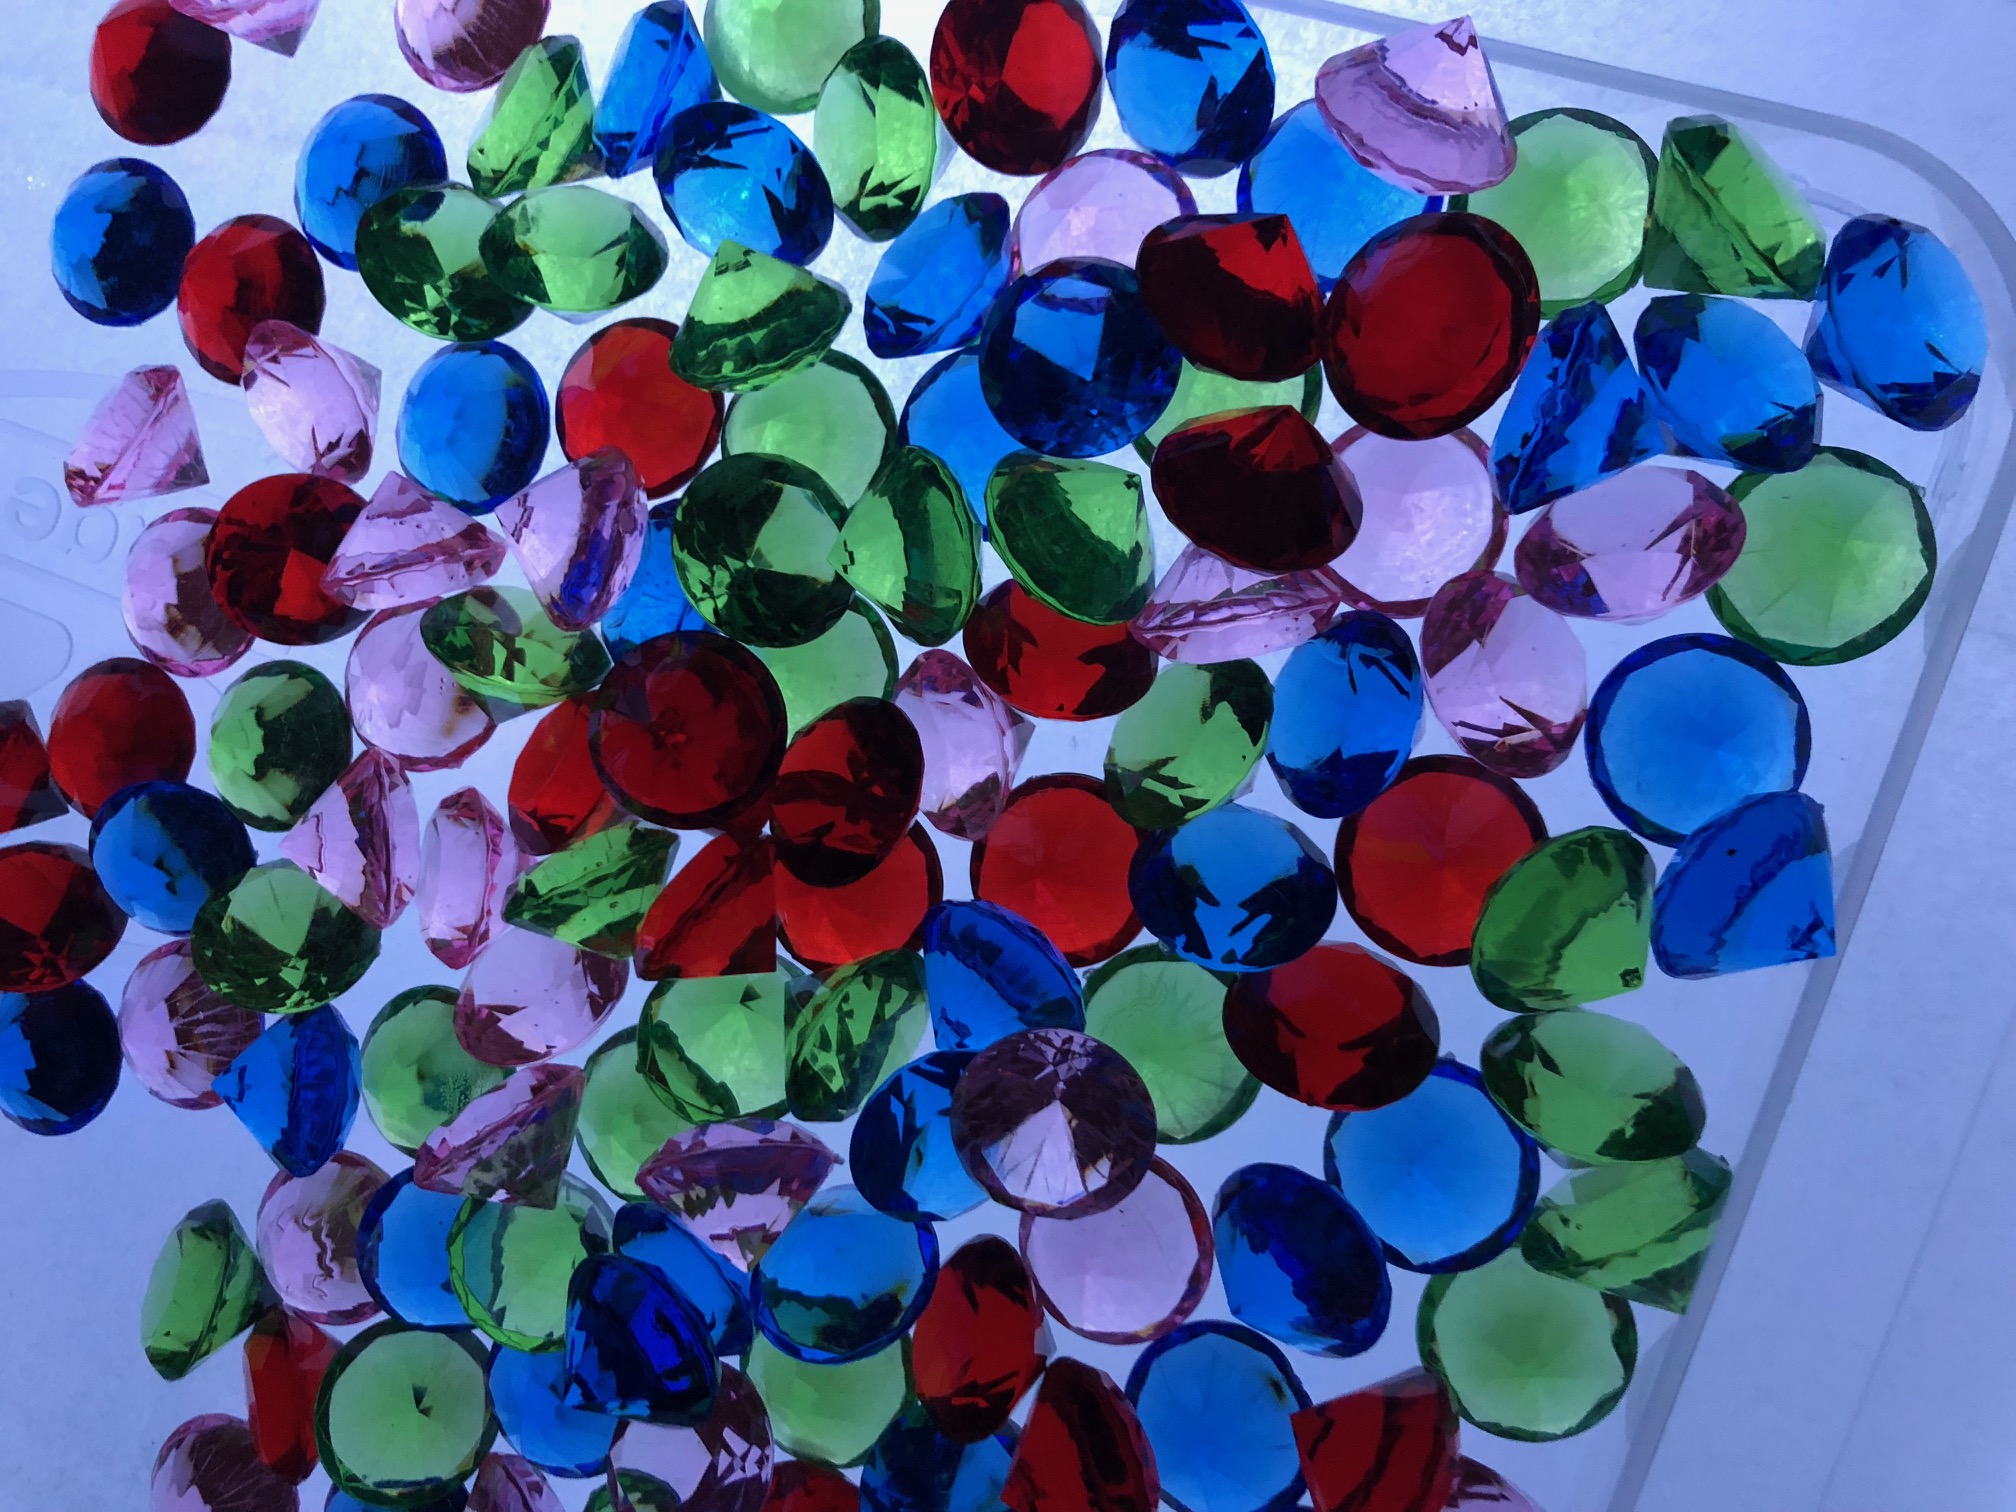
This DIY Light Table definitely shows up better in a dark room. When the twins woke from their sleep, we set the table up in the front room with the roller shutters down. After previously experimenting with a few different ways to use the sparkly gems (colour sorting and gems with goop) we bought from the discount store, I thought these would be perfect to use first.
The twins loved them and immediately they started labelling the colours and sorting them into piles. I introduced them to making patterns and we also made different coloured flowers with the gems. I didn’t add anything else to the table and they were busy all afternoon, only putting them away when it was dinner time.
Stay tuned for what comes next with our DIY Light Table.
IF YOU LOVED THIS ACTIVITY, SIGN UP TO RECEIVE ALL OUR LATEST IDEAS TO KEEP THE KIDDOS ENTERTAINED.